Categories
Ultimate Guide

Glider vs Rocker: Which One to Choose for Nursery?

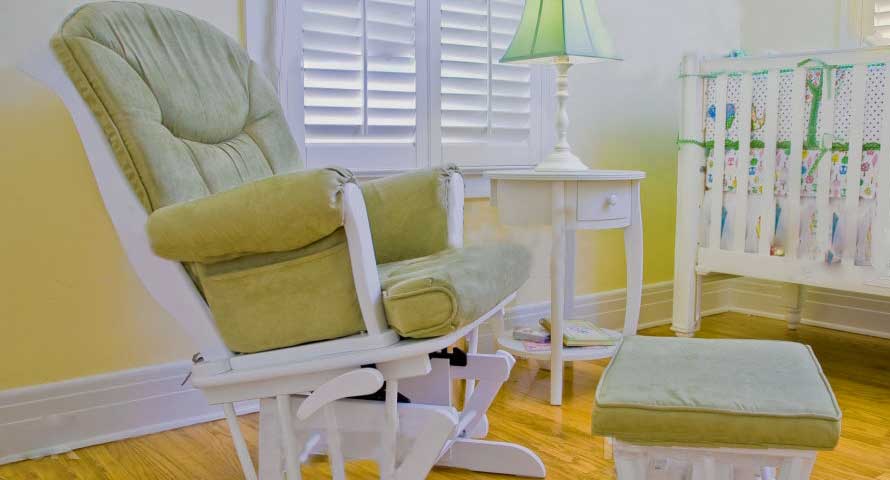
Decorating the nursery is just as important as any other part of preparing for the baby’s arrival. One of the most crucial decisions is picking a comfortable chair for the nursery. While there are many types of chairs to choose from, two popular options are gliders and rockers. Both offer a soothing motion that can help lull a baby to sleep, but they differ in their design and functionality. In this article, we will explore the pros and cons of using a glider vs a rocker in the nursery. Whether you’re a new parent, or simply looking to create a cozy space for your little one, read on to find out which option is best for you. 

Tips for Choosing a Nursery Glider and a R ocking Chair?

Some factors that parents might consider when choosing a nursery glider or rocking chair:

1. Comfort: Look for a glider or rocking chair that provides ample support for your neck, back, and arms. The chair should also have enough room for you to comfortably sit with your baby.

2. Durability: Choose a chair that is sturdy enough to withstand daily use and can last for years.

3. Wide Seat: When choosing a chair for breastfeeding, it is important to consider comfort and ease of use. One key feature to look for is a wide seat. A chair with a wide seat provides ample space for both the mother and baby. With a wider seat, moms can find the right breastfeeding position and establish a comfortable rhythm for feeding. It is also beneficial to have a designated breastfeeding station, where necessary items such as a nursing pillow and a burp cloth can be stored within reach.

4. Style: Consider a glider or rocking chair that fits your personal style and decor.

5. Upholstery: Look for a chair with durable and easy-to-clean upholstery, and consider a color or pattern that complements your nursery.

6. Smoothness: Look for a glider or rocking chair with smooth gliding or rocking motion.

7. Noise Level: Ensure the chair has minimal noise level or complete silent motion.

8. Adjustable Features: Choose a chair that may offer an adjustable footrest, reclining backrest or both, along with different speed rocking or gliding options.

9. Price: Consider your budget when selecting the best glider or rocking chair as you don’t want to break your bank when other baby expenses exist.

10. Longevity: Choose a chair that can be used beyond nursery needs as it can serve as a good addition to a living room or bedroom space.

Glider vs Rocker: Which One to Choose for Nursery?

The biggest difference between a glider and a rocker is, a glider tends to move in a forward and backward motion, whereas a rocker moves up and down. Now read the other comparisons.

Glider vs Rocker for Nursery

What is a Glider Chair?

A glider is typically designed with a cushioned seat, backrest, and armrest, making it a comfortable seating option for new moms. The plush feel of the chair provides added comfort, and the gentle sway motion is perfect to soothe a fussy baby. A glider offers a smooth and effortless motion that allows for a relaxed and calming environment during feeding or soothing the baby.

Recommend to read our post: How to Recover a Glider Rocker without Sewing.

Glider for Nursery: Pros and Cons of Gliders

Pros:
– Gliders move back and forth in a smooth and gentle motion, providing a calming effect for both the baby and the parent.
– They often have a wider and more comfortable seat than rockers, making them ideal for long hours of nursing or rocking the baby to sleep.
– Some models come with matching ottoman and, locking mechanisms, which can be used to elevate the feet and enhance relaxation.
– Gliders are generally quieter than rockers, which can help prevent waking the baby up.

Cons:
– Gliders are typically more expensive than rockers, and some models require assembly or come with additional parts, such as an ottoman, which can add to the cost.
– Some gliders can be bulky and heavy, making them difficult to move around in the nursery or when relocating.
– Not all gliders come with adjustable armrests or headrests, which can make finding a comfortable sitting position a challenge for some.

Rocker for Nursery: Pros and Cons of Rockers

What is a Rocker?

A rocking chair or rocker is a type of chair with two curved bands of wood (also known as rockers) attached to the bottom of the legs. This allows the chair to rock back and forth in a smooth and soothing motion. Rocking chairs are often associated with relaxation, particularly for use on porches or in living rooms. They come in a variety of styles, from traditional wooden designs to modern upholstered versions.

Pros:
– Rockers are generally less expensive than gliders, making them an affordable option for many.
– They come in various styles, designs, and colors, allowing parents to choose one that matches the room decor.
– Rockers have a classic, timeless look that appeals to many parents.
– Some models have a more upright and straight seating position, making it easier to get in and out of them.

Cons:
– Rockers can be noisy, especially if they have wooden parts that rub against each other.
– The rocking motion can be jerky and inconsistent, which can be uncomfortable for some parents and babies.
– Unlike gliders, rockers require some effort to move back and forth, which can be a challenge for parents with mobility issues or back pain.
– Some models have a narrow and uncomfortable seat, which can lead to back pain or discomfort during extended periods of use.

Is a Glider or a Rocker Better?

The choice between a glider or a rocker depends on personal preferences and needs. Gliders and rockers both provide gentle back and forth motion, but gliders move in a smoother and quieter motion, while rockers have a more traditional and rhythmic motion. Gliders are also available in various styles, such as swivel or reclining, making them a popular choice for nurseries, while rockers are great for those who prefer the classic look and feel of a rocking chair. Ultimately, the best choice depends on the individual’s preferences and needs.

In conclusion, both gliders and rockers have their pros and cons, and the final decision depends on personal preference, budget, and the level of comfort desired. Parents should test both options before making a purchase to ensure that they are comfortable and suitable for their needs.

Categories
Moms Zone Ultimate Guide

How to Organize a Perfect and Comfiest Breastfeeding Station?

A new mom has to go through breastfeeding or pumping during the day to night times with the baby. So the nursing station should be comfortable and well decorated with necessary items. Make your breastfeeding journey enjoyable, memorable, and easy as possible. Arrange a proper breastfeeding station; just keep everything within your arm’s reach.

You will need the following accessories to set up a comfiest and perfect breastfeeding station:

Breastfeeding Station Essentials:

Select a Comfortable Breastfeeding Chair: 

To set up the baby feeding station a comfortable seat is most important for Mom (or anyone else handles feedings). A mom has to spend a lot of time breastfeeding or pumping. In that case, you have to ensure a comfortable chair, rocker, or glider in the room.

We recommend you research the best breastfeeding chair beforehand. In this article, you will get a proper guide and review of top-quality nursing chairs for the new mom. 

Nursing Pads:

Leaking another breast while feeding is a usual situation. Many mamas use some disposable or reusable breast pads nearby hand to keep the milk from wet freely and staining tops.

The breast pad from Kindred Bravely has a great shape and is super absorbent. They make amazing nursing bras too; just read out the kindred bravely pumping review here.

If you shop there, use this link and enjoy a 10% discount for first-time purchases.

A Breathable Nursing Pillow:

 It is one of the most important accessories of a nursing station. It helps to moderate pain in your arm, shoulders, and back with supporting feeding time. Also, it helps to ensure a comfortable nursing position. See the collections of nursing pillows at Amazon.

Nipple Care: 

A sore nipple is a common problem of a breastfeeding mom. And it occupies the smooth breastfeeding process. To deal with the problem you can keep soothing ointment like Purelan nipple cream nearby. Also, hydrogel pads could be a great option for soothing sore nipples. If this issue stays for a long time don’t delay visiting the lactation consultant.

Extra Diaper and Wipes: 

Making a frequent dirty diaper is a baby’s usual behavior. On the other hand, feeding can invigorate their digestive system. During midnight feeding season you need to change with extra diapers and wipes. Readout our cloth diapers review and buying guide here.

Snacks:

A new mom should never be hungry. It is found that a breastfeeding mom can burn 500 calories each day! Mom supplies the best food for her newborn baby. 

Keep your favorite healthy snack at your nursing station. You can consider snacks with Trail mix, protein bars, salted popcorn, fresh fruit like bananas, apples, or pears when you need to refuel and eat with one hand.

Also, you can include the most suitable protein powder that boosts your milk supply and lose weight after postpartum. Read out the Milk Dust protein review.

Breastfeeding Tracker Log Book Or mobile Device:

You can use a breastfeeding tracker logbook to keep track of feeding or sleep, changes, and more. And another option is to have your phone with you to track breastfeeding sessions using Medela Family app . You can log pumping time and track the last breastfeeding season. 

Pacifier:

 If you choose to use a pacifier they are a lifesaver for your baby. Just keep some clean ones with other accessories of breastfeeding supplies. It will help you to easily access it whenever the little one needs it.

A Water Bottle: 

Everybody should hydrate with water, especially a breastfeeding mom should never negate it. Also, some mama feels thirstier during feeding time. Having a bottle of water near the arm make mom’s comfortable environment. Also, choose the bottle which is easy to hold with one hand.

Night Light:

 Due to mid-night feeding or a dark environment in the room, a soft nightlight or lamp is a mandatory item to decorate a perfect breastfeeding station. Also, the mom needs to awake, do something without disturbing baby’s sleep.

Burp Cloth:

 Don’t forget to have some burp cloths at the nursing station. Burp cloths are a must to handle Mama’s dripping breasts and sometimes baby’s spit-ups of the nursing session.

Caddy:

A Basket, bin, or caddy with a handle will fit to keep your little nursing accessories easily. To easily reach everything during a nursing session you can pick this type of caddy with a handle.   Also, it will allow you to take from room to room in your house by creating a portable nursing station.

Utility Cart on Wheels :

On the other hand, if you want to store most of the nursing items in one place you can choose a utility cart on wheels for the nursing station. They have 3 (4, or 5) wire shelves that will fit most of your essentials. You can keep a breast pump machine, hands-free nursing bra, breast shells, breastmilk storage bags, and coconut oil on one shelf. And others are for storage of remaining breastfeeding essentials.

Pretty-to-haves:

Spending time with a baby is a magical stage. When passed time you miss those moments. So makes the nursing session just enjoyable. Consider nice-to-have items for the feeding station like books, magazines, or electronic readers.

Keep the electronics devices charger in arms reach so that you can recharge them before totally run out. Also, use earphones and refresh yourself without disturbing your little baby.

A Trash Can :

Small trash can definitely make your breastfeeding time beautiful. You can dispose of the used breast pad or wipes, dirty diapers, or fruit peel into it.

How to Organize Breastfeeding Supplies

In this video, you can get an idea easily and will be benefited.

It’s a beautiful bonding time with the baby. Organize your breastfeeding station and enjoy it…!!!

Categories
Kids

15 Cute Toddler Girl Hairstyles That Are Quick Easy and Adorable

Every mom has a dream of having a girl dress up nicely, let her beautify, and also dream of styling the toddler girl’s hair as it is short or long. Moms have to spend a busy time in many household works. Among the busyness, they also want to fit their toddler girl with a pretty dress plus a cute hairstyle. Are you one of the lucky moms who do not want to miss a group of trendy and eye-catchy toddler girl hairstyles?

The toddler girl hairstyle has a variety of colors, many styles, and shapes. You can try cute toddler girl hairstyles on your little daughter with this easy tutorial.

Tips For Caring Toddler Girls Long Hair :

Toddler girl hairstyle has an important impact on toddler girl personality and toddler girl looks at an early age. Toddler girl hairdo looks like a mini teen girl and you will find several different styles to make her look good. When you look at a little girl with long hair, that pretty looks definitely. But for the mom, it is a little tricky to maintain the long hair of her daughter. So, follow the 5 tips that really work for maintaining a toddler girl’s long hair.

Use A Specific Conditioner

Baby shampoo is perfect for the little one’s hair. But for hair of thick and long use a particular conditioner to minimize tangle and give a soft feeling during brushing time. This conditioner from amazon is so popular with mom. You can go through the link to see the details

Combing

This part is also important like others. Toddlers are always in rush, and not mature to care for themself. So brush the long hair after bath or during the wet condition. In this situation, it will not be painful and fewer chances of hair breakage.

a. Firstly start combing through the end of the hair and go to the upper step by step. 

b. Use a wide-tooth comb or a paddle brush (best for thick hair).

c. On the other hand, it is also found that a detangler brush’s flexible bristles are good for all kinds of hairs as it is thickest or curliest. So you have an option to pick this type of brush according to the girl’s hair type.

Use Detangles Spray

You can use a best detangling spray on the toddler’s dry hair as it is not only for wet hair. Just leave it for 1 minute and easily comb through the hair. You have an option to try this leave-in conditioner after bathing for tangle resistance.

Make A Specific Toddler Girl Hairstyle For Healthy Hair

You will be happy to know that some kind of hairstyle like half-up, fashionable braids, and twisted braids ponytail is not only toddler girls hairstyle but also return their healthy hair. These types of styles are suitable in school, on any occasion, or in a place you want to go with your little girl

Note: Useful for kids- How to Make Slime with Detergent

Use Cute Hair Accessories

Accessories like hair bands, scrunchies, and headbands can make your toddler girl hairstyle more attractive. You can go for colorful bows too which will give a cheerful look to the overall appearance.

15 Cute Little Girl Hairstyles Idea :

Below are the 15 toddler girl hairstyles that are acceptable to many moms and also popular this year.

1. Multi Segmented Pigtails

When your girl is growing up with medium to long hair, then the time is yours. Just follow the way by using simple colored elastics and two cute hair bows. Here are some popular hair bows with pink and other colors. you can choose from here.

2. High Pig Tail With Messy Buns 

This is one of the easiest hairstyles for toddler girls. You already noticed a little girl looks so adorable with any kind of pigtail. Also when you combine a messy bun with the remaining hair it just looks gorgeous. Hair bows are from here.

3. 4 French Braids With Messy Buns 

Image from: simplyhairideas

Definitely, you will need some additional time to make this hairstyle. But finally, you will be more satisfied looking at your daughter. And a pair of matching colored hair bows on 4 French braids messy buns will enhance its beauty.

4. Double Bubble Braid Hairstyle 

Image from: Hairstyles by LittleGirlHair

This is one of the most popular hairstyles for little girls. In the double bubble braid hairstyle, you can add bright collared elastics. Thus your toddler will look shiny, she feels special and will be happy in any place like school or an outdoor playground.

5. Middle Part Segmented Pigtail Buns

Middle part Segmented Pigtail Buns hairstyle can provide a very cool feeling to toddler girls’ long hair in summer. There is a full segment through the middle part and many small portion sections in this hairstyle. Finally, make a pigtail bun with the remaining long hair. Just feel how cool it is!

6. Double Top Buns

This style is still a strong trend and we also recommend trying it, because of its easy steps, less time-consuming, and pretty look on her head.

Simply make two pigtails on top of the head. Wrap all hairs with two wide elastics and make a bun. Finally, hide the extra hair into the base of the hair. And lastly, you can beautify it with two cute hair bows. 

7. French braided Half up Half down

Image from – hair4littlegirls 

When you plan to arrange your daughter’s hair for any occasion this French braided half up half down style surely makes a beautiful look. You need to learn how to make this type of braid and apply the likable style.

8. Section Segmented Pony

This style makes pretty look like the smaller hair of a toddler girl. Just create 3 sections, tie the front part, and then add the lower part of the hair with the base of the second section. 

Do the same with the third one and finally complete the style by making a ponytail with the remaining 2nd section hair.

9. Cute Toddler Girl Hairstyles With Middle Part Segmented Braid

Cute Toddler Girl Hairstyles Wih Middle Part Segmented Braid

When you offer this type of hairstyle, you can find that most toddler girls will love to see this on their heads. And, also many moms love to make this braid to make on another style. So, just learn how it does and apply it to your daughter’s hair.

10. 3 Sectioned Topsy Turvy High Half Up Pony

For making this hairstyle you need a topsy tail tool. It is not a waste of money but you can also create multiple hairstyles for next time on your or your daughter’s hair. In this video, you will get an easy topsy turvy twist tutorial.

11. Top Sectioned French Braid Pig Tail Buns

This little girl’s hairstyle looks secure enough for all day and maybe perfect for the next day also. Finish the top sectioned French braid with a pigtail messy bun and give a pretty look with her favorite hair bows.

12. Bottom Messy Bun With Side Twist

This is just a wow and one of the easy toddler hairstyles. Take the front side hairs, makes it the French twist and wrap it nicely. Finally, gather the rest of the hair with the bottom hairs and ensure a messy bun.

13. Side Braid Ponytail

Image from: Easy Toddler Hairstyles 

You can enhance the old-fashioned simple side ponytail. We can ensure that your little girl will love this hairstyle. 

Just also combine a braid look on your daughter’s hair. Make a side braid by starting from the forehead. And finalize a low-side ponytail with an elastic (you can also attach a beautiful hair bow). This hairstyle can be perfect in any place. Just easy and try it now!

14. Topsy Turvy

Have you ever tried this pretty style on your girl’s hair? Firstly, make a ponytail. Then create a hole on the elastic and insert the pony and simply pull it through the hole! And it’s done! Is it not an easy process! See if your toddler girl will also love it.

15. 3 Part Side Ponies

This is a cute and simple hairstyle for little girls. While you think for an average pony style this super-easy side-sectioned pony will return your girls a pretty look. In this way, you can match up with the outfits of the little one.

16. Cute Half Up Hairstyle

Image from: Easy Toddler Hairstyles

This is one of the so adorable toddler girl hairstyles. Most moms love to make this style on their daughter’s hair. You can also try it. This may help you to complete the style.

Frequently Asked Questions

Q1:Should I avoid cutting my child’s hair too short?

A: There is no one answer to this question as different parents have different opinions on the matter. Some people feel that short hair looks cute and fun, while others believe it can be more difficult for kids to manage their hair if it’s too short. Ultimately, you’ll need to decide what haircut your child will enjoy wearing and make sure you trust your own judgment when it comes to deciding how long to cut their hair.

Q2:Which hairstyles are best for curly or wavy hair?

A: If your daughter has curly or wavy hair, you’ll want to choose hairstyles that will keep her hair styled and looking good. Curly girls love bouncy waves in their hair, while wavy-haired girls prefer sleek styles with a bit of wave action. So whichever hairstyle is best for your daughter’s curls or waves, go for it!

Q3:What is the best way to style a toddler’s hair?

A: At home, you can easily style a toddler’s hair with a few simple tools. You’ll need some hairspray or gel, a brush, and your daughter’s favorite hairstyle accessory – barrettes, headbands, or pigtails. Apply some hairspray or gel to the child’s hair and use the brush to distribute it evenly throughout her locks. Then put on her favorite hairstyle accessory and go about your day!

Q4:How do I choose the right hairstyle for my toddler?

A: A good way to find the right hairstyle for your toddler is to ask her what she wants. If you can see a picture of the style your child wishes to have, it will make choosing the right hairstyle much easier. If not, simply take a look at fashionable toddler girl hairstyles and choose one that matches your daughter’s personality and fashion sense.

Q5: Is it okay to dye my toddler’s hair?

A: Many mothers choose to dye their toddler’s hair because it is a simple and affordable way to change her look. However, you should always consult with a doctor before attempting any hair coloring on your child. Some colors are very dangerous for children and can lead to skin reactions or other health problems. Always use caution when choosing colors for your little one!

Conclusion

We hope you enjoyed our roundup of toddler girl hairstyles! From easy braid hairstyles to cute pigtail hairstyles, we’ve got you covered. Whether you’re looking for a quick and easy hairstyle for your little girl or something a little more sophisticated, we’ve got you covered. Be sure to check back regularly for new toddler girl hairstyles!

Categories
Moms Zone Ultimate Guide

When Is It Too Late To Start Breastfeeding?

Having a baby for the first time can be an exhausting process for the mother. Sometimes. due to stress. there can be many problems regarding breastfeeding; there are times when mothers have lactation issues when the baby is born. Due to this reason or some other. they are diverted towards bottle-feeding other than breastfeeding. If you are one of those mothers and you now want your baby to cherish breastfeeding not to worry. We will tell you all about when it is too late to start breastfeeding. So you plan accordingly.

How to start breastfeeding after bottle feeding?

1. Your baby is probably already attached to the bottle; it would be hard but not impossible. The very first thing you would need to do is. Pump your breast and increase your milk supply. In most cases. the milk stops secreting out of the breast if the baby is not getting fed from it.

2. Develop a skin-to-skin connection with your baby.

3. Make your bottle feel more like your breast. and your breast feel more like a bottle with various nipples.

4. Try to get your baby latched when he or she is sleepy; it works most of the time.

5. Avoid using pacifiers and feeding everything via a bottle.

6. Slow and steady steps with patience will get you there.

How long does it take to rebuild the breast milk supply?

I have watched mothers stressed out about how will they rebuild their breast milk supply and how long will it take to get the proper flow? Not to worry. rebuilding your breast milk supply might be tricky. but it’s not that hard.

It won’t take you from three days to a week to reach your proper flow with the right tips and tricks. Don’t break a sweat. ill tell you what to do.

Some tips to re-lactate successfully :

I have gathered out some most effective tips for our super mothers to supply milk and re-lactate efficiently.

Tips 1 : Our bodies are made in the most amazing ways if you want to have healthy milk production. You have to try to latch your baby onto your breast; for example. when he or she is sleeping. the sucking effect from the baby triggers a hormone in your breast letting the milk come down to your breast and the baby efficiently.

Tips 2 : Try to get your baby to latch on to both of your breasts. don’t designate one side of your breast to breastfeed. Allowing the stimulation on both sides will encourage a good flow.

Tips 3 : One of the best and most effective tips to increase your breast milk supply is to let your baby be the boss of your breast. This means let the baby whenever it’s hungry and let it stop when the baby feels like its tummy is full. If it wants more. you will be informed by the crying. don’t monitor the clock when feeding; let the hormones do all the work.

Tips 4 : Sleeping facing down feels great but did you know that any pressure on your chest can lower your milk supply further? Yes. correct your sleeping posture and try to put no pressure on your chest or breast.

Tips 5 : Take in good and nutritious foods and ample water supply. a dehydrated. stressed. and worked-up mom goes through several hormonal changes. which is not healthy for the mom or the milk supply.

Tips 6 : Stimulate your breast; the easiest way to stimulate your breast is by a hand-stimulating technique. Avoid anything responsible for decreasing your breast supply further such as alcohol. smoking. etc.

Some faster and easier ways.

Alongside all the tips mentioned above. you can also go for a perfect hospital-grade breast pump. Like this breast pump will help you in stimulating your breasts; it will trigger your lactation hormones too. Your flow will eventually increase faster with a good breast pump.

Not just that. more appliances help with breast milk production. such as lactation helping massagers.

Apart from these electronics. you can consult your doctor and go for a lactation supplement responsible for triggering your lactation hormones. There are many supplements available on the market and among them, this breastfeeding Supplement with Fenugreek helping your flow increase.

Related: 9 Best Breastfeeding Rocker and Glider[Nursing Chair] Review

Foods that increase milk supply :

Certain consumables such as alcohol or smoking can cause your milk supply to decrease; just like that various nutritious foods trigger your breast milk supply. such as.

Oats. You can consume oats as a hearty oatmeal bowl or have oat milk instead. It’s loaded with iron and nutrients. and it’s said to increase your breast milk supply.

Fennel Seeds. They have compounds that resemble the hormone estrogen. which triggers a great flow.

Meats and Poultry. Again. they are loaded with iron.

You can have Barley; it’s rich in beta-glucan and is proven to help with breastfeeding issues.

Garlic. It has galactagogue and also a great flavor. Make sure to add a good amount in your next meals to increase your breast milk flow.

Raw Almonds and Other Nuts. They are filled with nutrients such as calcium. It will enhance the taste of your breast milk. which will attract the baby. but it will also improve production.

Apricots are great for increasing lactating hormone levels. Don’t miss out on them if you are looking to increase your breast milk flow.

In short. if you want to increase the flow of your breast milk. make sure that you have ample nutrients along with some hormone-triggering foods.

When is it too late to start breastfeeding?

There are a cycle and procedure to everything; the same goes for the human body. Yes. there can be a time when it’s too late to start breastfeeding.

It depends on your lactation flow and your baby’s age. The baby is observed and said to latch on and adapt to the breast more efficiently when six months and lower. If your baby is six months above and you cant achieve the flow with any means, then maybe it’s time you focus on how to fulfill your baby’s nutrient need by other means.

Recommended reading: When is it Too Late to Wear a Belly Wrap?

Final thoughts :

Don’t worry if it’s too late to breastfeed; several babies grow up healthy. and the same as any other breastfeed baby would grow up as. Focus on yourself. your healing and. your baby’s nutrient intake. Rest will be fine.

Categories
Ultimate Guide

How to Recover a Glider Rocker without Sewing ?

It is comparatively easy to buy a glider rocker. Normally they are sold in furniture shops, online sites retail stores, or second-hand shops. But when you want to match with nursery room; it is a little tricky to match from default factory upholstery.

On the other hand, if you buy a second-hand glider rocker or it’s one of the Best Nursing Chairs, naturally your mind may thirst for a unique look of the product.

That is the reason, you should learn to reupholster a glider rocker cushion on your own, And even if you have no sewing experience you can do to recover a glider rocker.

So, learn how to recover a glider rocker without sewing experience-

Process 1: Using Velcro Brand Fabric Fusion Tape

What items will require:

[su_list icon=”icon: hand-o-right” icon_color=”#567ac3″ ]

  • A glider rocker that will be recovered
  • Fabrics that recover the glider cushion. And Buy your enough favorite color upholstery fabric
  • Velcro Brand Fabric Fusion Tape ; the alternate way of  sewing process
  • Hot Glue as a substitute for needle and thread (sewing)
  • Scissor
  • Seam ripper

[/su_list]

How do, Step by Step Process:

[su_list icon=”icon: hand-o-right” icon_color=”#567ac3″ ]

  • Firstly uncover the chair and see the glider’s structure; if it is ok for use
  • Then remove the current fabric of the cushion. In this case, use a seam ripper to rip out buttons and do it carefully as if the cushion remains good. You may need scissors to do it perfectly.
  • Now place new upholstery fabric on a flat space and trace around the cushion using chock. Make sure you have sufficient fabric to wrap the cushion and for adding fold.
  • Now cut the marking part. And wrap it like a gift box to confirm it looks good and smooth. Also, be sure the joint will be placed on the bottom or back part.
  • In this portion fold the edge of the fabric and make it stable using glue. Now pill the Velcro fabric tape and stick on the seam of fabric. And put the opposite part in the same way.
  • Now ready to use in the chair
[/su_list]

Process 2: Make Upholster Using Removable Zip-off Cover

What items will require:

[su_list icon=”icon: hand-o-right” icon_color=”#567ac3″ ]

  • Hot glue gun
  • Glue
  • Hem tap
  • Canvas cloth/medium to heavy-weight fabric
  • Muslin fabric
  • Iron
  • Zipper

[/su_list]

How do, Step by Step Process:

[su_list icon=”icon: hand-o-right” icon_color=”#567ac3″]

  • You have another option without Velcro tap. That can be done by removable zip off cover.
  • Firstly hem each edge of muslin fabric and the upper Canvas cloth using hem tap. Just put the hem tape on the edge of fabric. Fold it and iron on there, press down, and hold about 90 seconds. If they not joint strongly take more few seconds.
  • In this step, attached one part of the zipper with muslin fabric. The glue should be used on the fabric part of the zipper and also make sure no glue spread out on the cloth and no glue stick over the zipper opening-closing part. Thus you may be in trouble to fulfill the aim of zipper.
  • Once it is complete join another part of the zipper with canvas fabric following the same process.
  • Now you are on the way to the goal. Just close the other 3 parts of the two fabric using glue. And make sure there is no opening part that exists in the three parts.

[/su_list]

However, In this case, attaching gripper may seem a little tricky. But visual guide makes it easy to capture. This video may help to assemble the cushion with zipper :

[su_list icon=”icon: hand-o-right” icon_color=”#567ac3″]

  • When it is ready you will be able to hold in cushion, just open the zipper, stuff cushion and close cover using zipper off.
  • Finish the task. Now put in the cousin and enjoy with recovered glider rocker

[/su_list]

This option is very useful as after a few days’ usages it becomes very messy and needs to clean a regular basis. Just open the zipper; pull out from the cushion and wash to ensure hygiene in the nursery room.

Finally, this is a very easy DIY project to replace the upholstery of a glider rocker; no need to have sewing experience. But definitely the sewing process makes it more durable. However, you finally recreate the glider matching look with the theme of the nursery room. And really return a very good feeling when you have done yourself at home.

Categories
Ultimate Guide

How to Hang a Swing on Branch Less Tree? – 2 Easy Ways

Children love swings! But then again, who doesn’t, right? Kids or adults, everyone likes the idea of spending the late afternoon hours in the backyard, swinging away, catching the breeze in their hair! However, the most significant problem people have when installing an outdoor baby swing is that they don’t have a tree with sturdy branches. If you’re going through the same issue, worry not! Here’s how you can install a tree swing no horizontal branch needed!

Best 2 Ways to Hang a Swing without Horizontal Tree Branches

Essentially, there are two ways to install a tree swing without the availability of branches. One of the methods requires a single tree, while the other requires two. Depending on your convenience and availability of trees in your backyard, you can choose either one.

1. Hang a Swing Using One Tree (tree swing no horizontal branch)

Suppose that you only have one tree available, and that too doesn’t have the healthy, large branches you need to install a swing. In another case, you might have several trees, but none of them are aligned together to give you the ideal spacing. In either scenario, here’s what you can do:

Picking a Tree –

Select the sturdiest tree that you can find. Even if it doesn’t have the branches, it needs to be strong and resilient enough to carry your child’s weight. If you want help with the selection, pick a relatively older tree since older ones can sustain more weight. Their roots are fully developed and fixed, and their bodies are sturdy.

A younger tree might look healthy, but there’s no way to make sure it’s fully developed yet. Thus, “play” on the safer side and pick the older one. Decade-old oak trees are the preferable choices.

This video may help more as visualize the idea :

Making an Artificial Branch –

Here’s the magic part! If your tree doesn’t have a horizontal branch, you can make one! Pick a suitable material for this purpose; make sure it is strong and resistant. Popular and preferable options include metal boards or strong wooden boards.

Apart from the strength and resistance of the material, make sure it is adaptable as well. Since you are going to nail or drill it into the tree, it should take the necessary shape and adapt to the position.

Last but not least, pay special attention to the length of the board as well. The branch should be a minimum of 1.5 meters in length. The thickness, however, depends on the weight you are going to put on it.

Attaching an Artificial Branch –

Once the artificial branch is complete and you’re entirely satisfied with the way it looks and feels, it’s time to attach it to the tree. This part is relatively more comfortable and doesn’t take more than a few minutes. Take a drill, some bolts or nails, and take a good look at the chosen tree.

Observe and find the right spot to attach the branch. This particular spot should be somewhere low, where other branches separate from the tree’s trunk. Place your DIY branch on the trunk and nail it down, making sure it’s fixed in place.

Once this part is complete, notice how much of the branch is hanging outside. This length shouldn’t be more than one or two meters, and the unit should be perfectly parallel to the ground. If your artificial limb ends up being too long, it could compromise the stability and lead to possible hazards later.

tree swing no horizontal branch

Hanging the Swing –

You are almost there! If you have a swing already, good! If not, you can purchase an entire kit that features ropes, chains, hooks, and a swing board. You can even make your swing at home if you want. There are several different types of DIYs on the internet, and you’ll have loads of fun doing this activity with your child. Plus, you’ll be saving quite a lot of bucks!

Once you get your hands on the swing, hang it from the artificial branch, and test it out! Let your child sit on the swing for a few minutes while you supervise. Check the branch and make sure it’s not moving. Ensure that it’s stable, and the swing isn’t making any uncomfortable movements.

2. Hang a Swing Using Two Trees (tree swing no horizontal branch)

If you’re lucky enough to find two consecutive trees aligned correctly, it’s an opportunity- take it! The process is pretty much the same: making sure that the trees are sturdy and robust, creating a fake branch, and attaching it to the trees. However, there are a few additional steps and benefits to this method.

Once you have the board ready, attach it to both the trees. It’s way more stable than installing a swing on one tree and ensures more safety. Nail the board on both the tree trunks, but make sure the distance is no more than 5 meters. Excessively long lengths and distances can compromise the safety and stability you were going for in the first place. Now, attach the swing as you did in the first method and test it out under supervision for a few minutes.

Some Extra Steps to Ensure Better Safety –

[su_list icon=”icon: hand-o-right” icon_color=”#567ac3″]

    • Don’t let your child sit on a swing unsupervised if they are younger than four years.
    • Make sure the rope is high-quality and doesn’t have any flaws or weak spots. Also, change the rope every couple of years.
    • Double-check the knots, nails, and joints, if any, and make sure everything is secure.
    • Before finishing and finalizing, have your kid try it out. This way, you can make sure the height is appropriate for your child. Swings that are too high or too low can be unstable and uncomfortable.

[/su_list]

In Conclusion –

So that’s how you install a tree swing; no horizontal branch needed! Pretty simple and easy, no? Hence, if you don’t think you have the ideal space for a swing in your backyard, look again. But this time, look with a keen eye and see how creative you can be with a little bit of motivation and an artificial branch!

Categories
Kids

Learn How to Make Slime with Detergent

The easy DIY process to construct slime with laundry detergent and the totally nontoxic recipe for kids, that means without Boric Acid, make slime with laundry detergent recipe.

Note: Boric Acid is an activator for making slime.

At present play with slime (It is icky, sticky, and gross) among kids is very familiar and trending, also becoming increasingly accepted with adults. By contributing slime making for kids, Parents also pass a good time with it as those provide a kind of sensory play, help to enhance creativity, and engage children for attention.

Now,

Skills Required: None. 

All age groups from toddlers to adults will be able to make it, but the first time may not hundred percent okay. Don’t’ be worried about it, it is really a very simple recipe. We need just a few ingredients.

You may recall why we didn’t enjoy with it like at present though all ingredients are in-home or close our hand. That was a simpler period, we did not come from such environments or our family scolded us to play with Tupperware containers or other outdoor play, right?

Cannot wait for the recipe :

How to make slime with detergent?

Ingredients Need to Make Slime:

There only need three Ingredients:

1. Laundry detergent

2. Water,

3.Glue (any kind of glue without super glue)

However, you can decorate or make an engaging look with many funny components. When I make Slime for my two children they are excited to add extras that return them more fun. I would like to explain the items in detail quickly; you can toss and see the final result.

What Laundry Detergent is Best for Slime?

It’s a DIY project. So, To make slime using laundry detergents you should try different types to get the best consistency. Sometimes may laundry detergent is okay but for any kind of glue (without superglue), it may not give you the perfect result. However, I tried with Tide and get a fantastic result. You can try using Tide, or Gain or Cheer.

Laundry Detergent Slime Recipe:

Tools and Materials:

1.Glue

2.Water

3.Laundry detergent ( Activator)

 and

4. Mixing bowl, Measuring cup,Fork, airtight container etc

Instructions: How to Make Slime with Detergent

1. Mix together equal amount of glue (without super glue) and water in a bowl. I used 1 cup of each as I will store and use next time.

2. Continuously stir the mixture with a fork until combined.

3. At the time mix some food color or glitter if you desired. Again mix thoroughly.

4. Now, add 1/2 cup of liquid laundry detergent. Begin mixing with a fork. And continue the mixing process until they get sticky and be a consistent look.

5. When slime forms, start kneading with hands and add any addins at this time.

6. Finally, store the slime in an airtight container when not being used. (because in open air slime will loos it’s behavior easily )

how to make slime with detergent

Tip 1: Here I mentioned 1-2 cup of laundry detergent as Activator. You should add them a little and stair, combine it, and again add a little. Repeat it until you complete the full process.

Tip 2: Use a bowl that only dedicated to crafting, though the ingredients are non-toxic and safe for food. And also using a designated bowl can reflect kid’s happy feelings.

What Add ins Can You Put in Slime Recipe?

Normally I use food color and sometime add glitter. But here are more options to use that  make funnier environment:

1. Food Coloring: For the base color you can use food color in the Slime

2. Action Figures: On a special occasion like for Halloween slime! You can use it.

3. Beads: Different types of plastic pony beads really create more fun

4. Buttons: When the slime is colorless the different colors and shapes of a small button make another look of slime.

5. 3D Polymer Slices: The fun creator are small polymer pieces and especially fruits are really adorable.

6. Essential Oils: It makes you really a good feeling for slime. the fragrance is really good.

7. Fake Snow: It’s the great items when makes slime on Christmas occasion.

8. Foam Beads: It is almost available near your house shop and colorful foam bead are really amazing pieces.

9. Glitter: For a very cool effect, this is the best tenants of Slime. You can only use it rather than others.

10. Polymer Clay: You can also use Polymer Clay for the slime recipe as it makes Slime softer.

11. Pigment Powder: Another way to add a base color is Pigment powder, they are Non-toxic elements for your kids.

12. Pom Poms: A lot of color and consistency can get from the little balls.

Have you enjoyed kids’ crafts and ready to prepare yourself  now? Let’s try and have many many fun with the little ones.